
As I mentioned awhile back, one of the things that changed once we had a kid was the massive amounts of laundry that we now contend with. One of the great mysteries of the world is how such a little guy can produce so many dirty clothes. Bibs, pants, diaper wraps, shirts, sheets, you name it. It builds up into giant piles that must continually be processed in the basement.
All that production came to a halt recently when Pretired Mama trudged upstairs to inform me that her clothes were warm but still wet. I went down to take a look and sure enough it was broken. “Well, the dryer heats up but won’t spin,” I told her. “It’s probably a broken belt.” I jumped on the interwebs to check my diagnosis and sure enough, we had a consensus.
I knew a broken belt on a dryer was usually a pretty easy fix so I was fairly sure I wouldn’t need a repairman to come out. Fortunately I found a very clear video on RepairClinic.com that showed how to repair the drive belt. But just in case anyone ever runs into this, I thought I’d give the quick overview of how to replace the belt.
- First, unplug your dryer. I probably shouldn’t have to say that, but we’re talking about enough power to kill you here, so just unplug it.
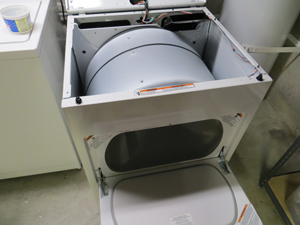
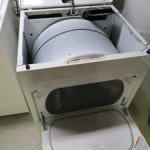 Open the top of your dryer (some models may open differently, but basically you need to access the outside of the drum). Mine opened by using a putty knife in the front by the corners. On mine there were also a couple screws by the lint trap.
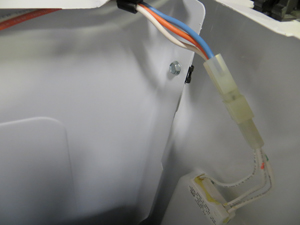
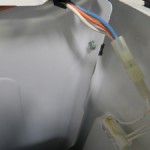 Disconnect the wires that go to the dryer door. This is for the switch that turns off the dryer when you open the door.
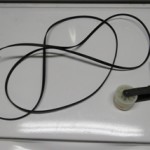
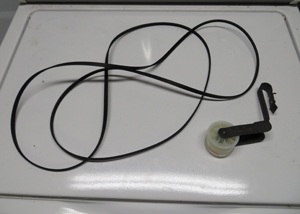
- Confirm the belt is indeed broken. You’ll be amazed how flimsy these little belts are.
- Remove the front of the dryer. Mine had just two screws near the top and then it lifts up and out.
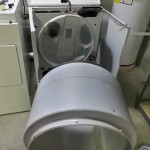
- Pull the drum out. It just sits in there loose so it’s quite easy to just pull it out of the way. You’ll be amazed how little there is to a clothes dryer when you see the insides. It’s especially obnoxious when you think about what new ones cost.
 Get your new belt handy. We ordered the Whirlpool 341241 Dryer Drum Belt
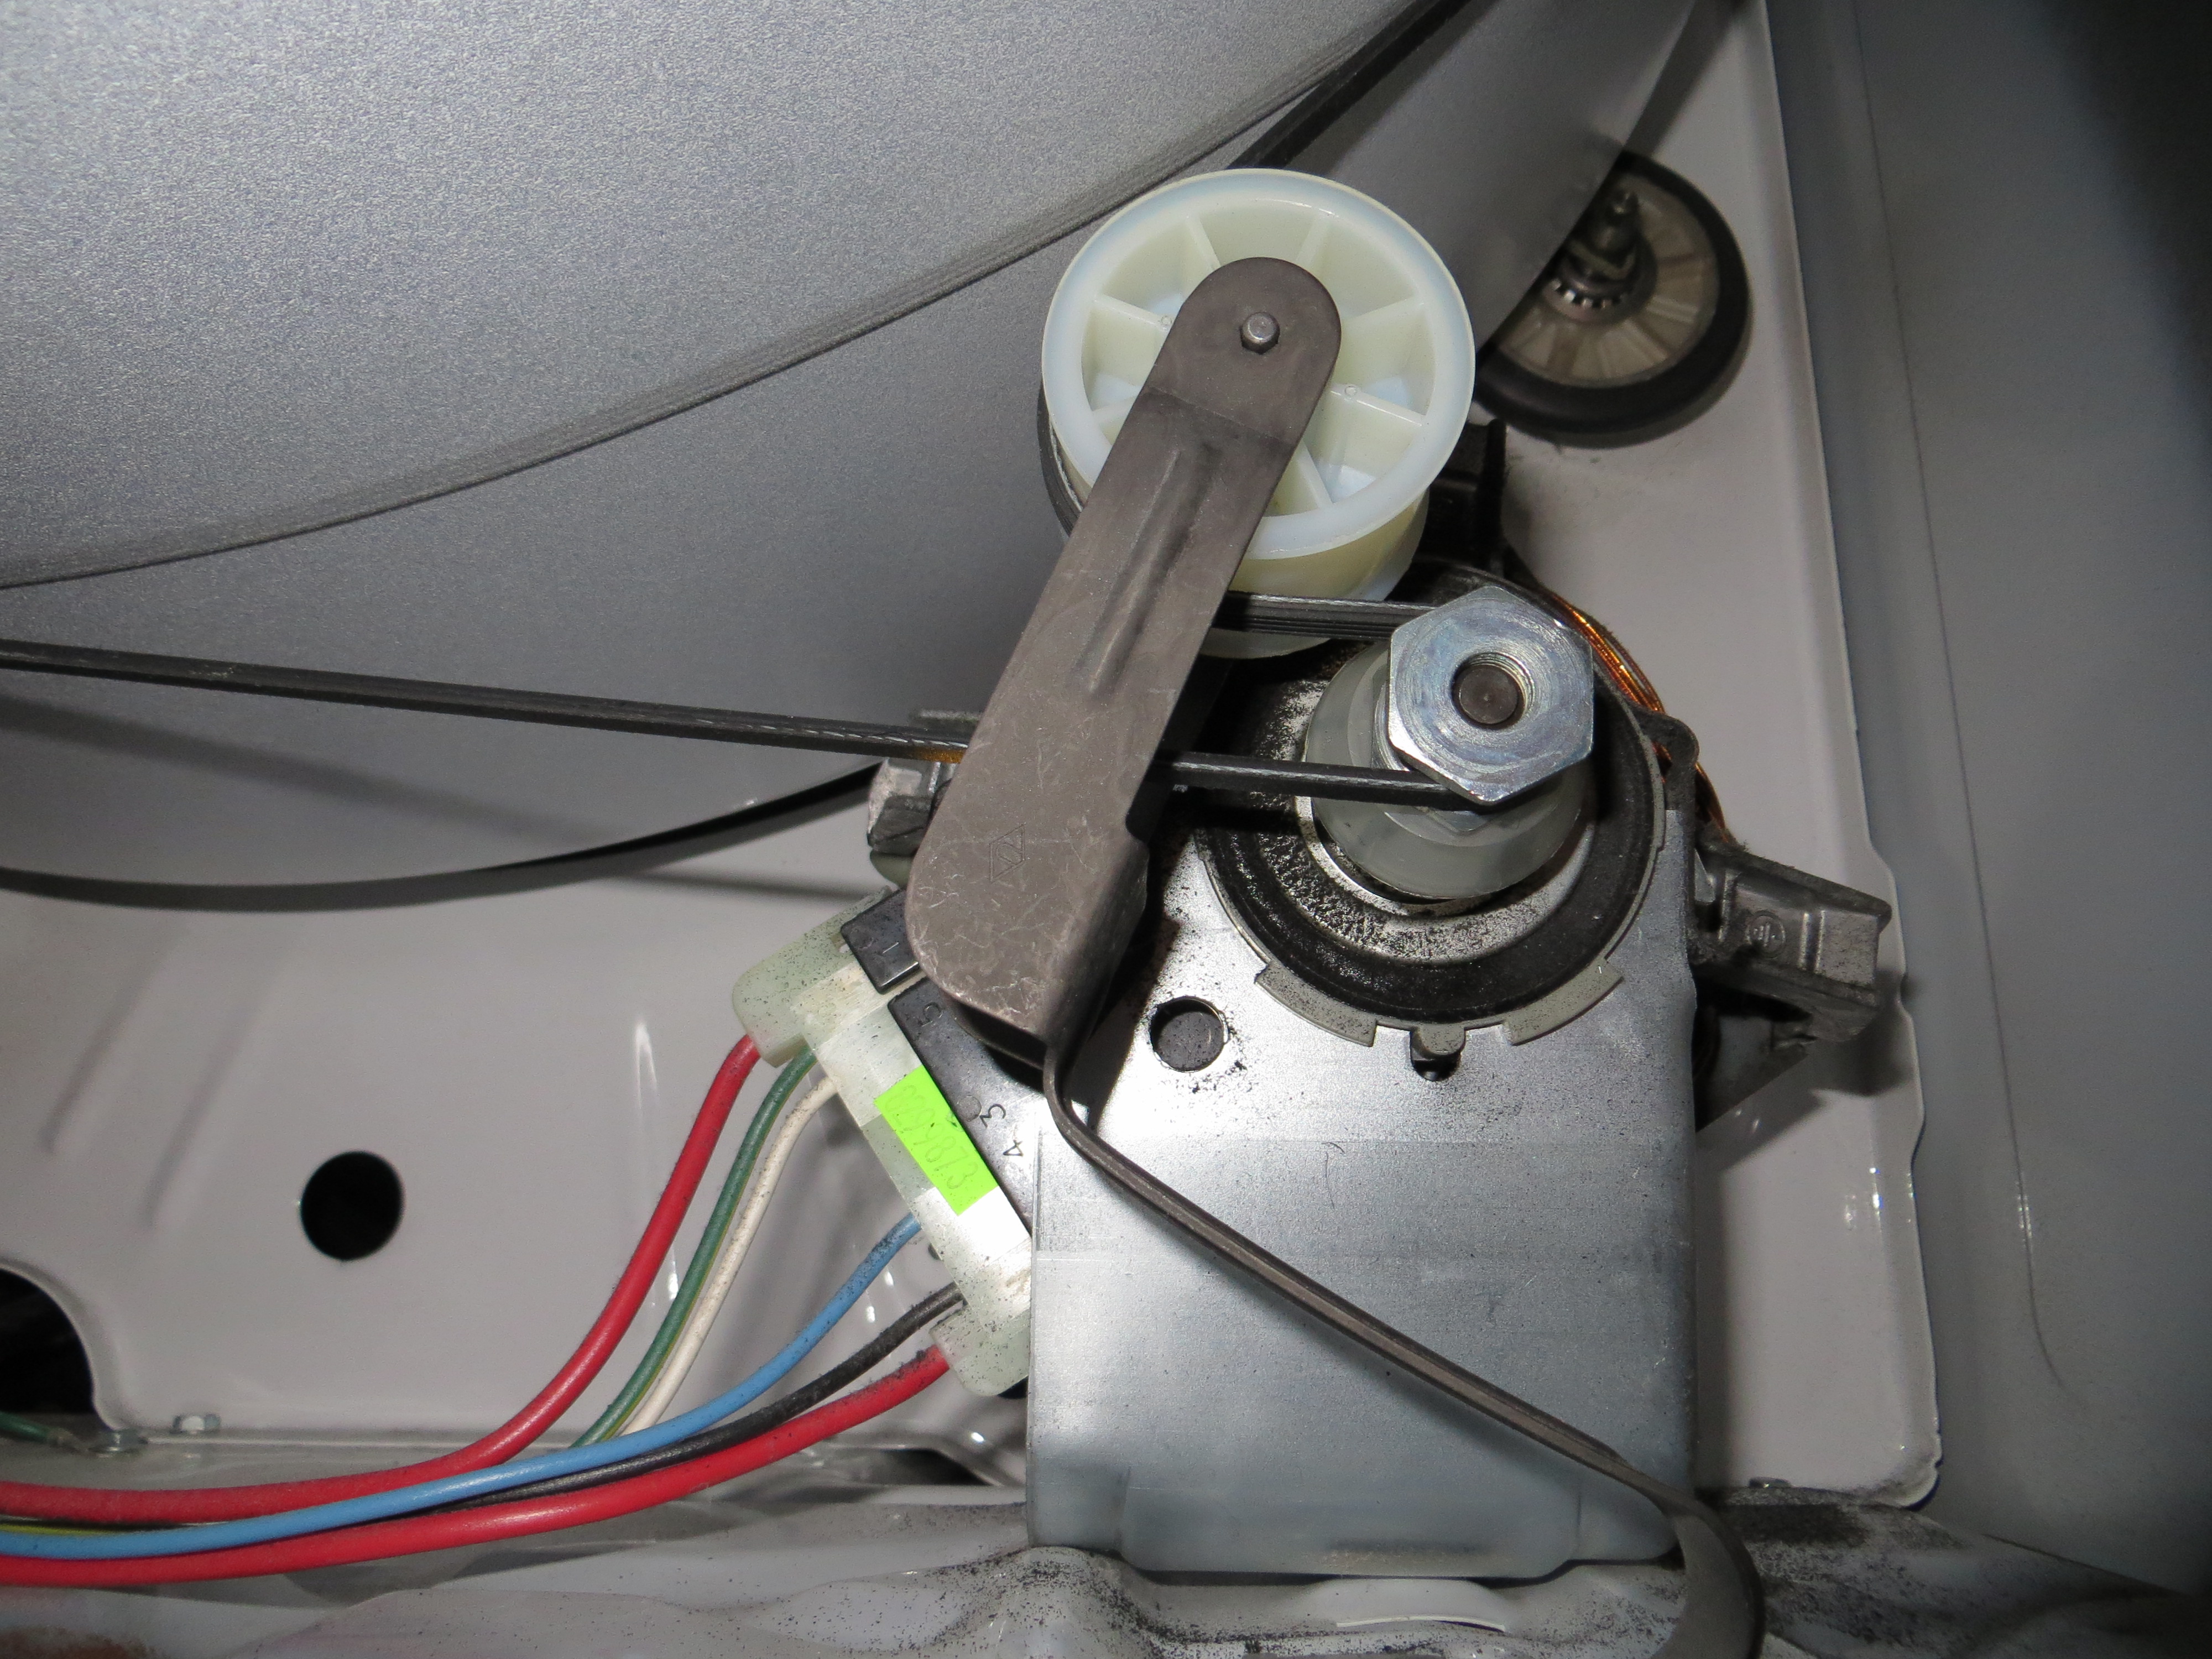
on Amazon for $5.70. If you need it sooner, you can probably find it at a local parts outlet, but you’ll end up paying much more. Since we already had our clothes air-drying, we could afford to wait a few days for the part to be mailed to us. In my case, the tension wheel looked different (looked broken) than the diagram so I ordered one as well, just in case, for another $6. In the end, I didn’t really need it, but I used it anyway because I think it was a better design. While you have the drum out of the way, you might want to vacuum up the inside of the dryer.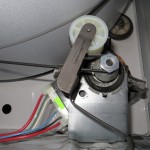 Now for the tricky part: put the drum back in place. Hold it there while you slip the belt over the top, making sure it’s not twisted. You’ll need to keep the drum in place while you make the final belt installation. Having someone help you will be a good idea or you can stuff something under the drum so it stays put. The belt goes on top of the tension wheel, and through the wheel assembly before going over the motor. Getting that on correctly was by far the hardest part of the whole project.
- Once the belt is in place, you can remove whatever you had holding the drum in place and try spinning it with your hand to make sure everything works correctly. The belt should be very tight and the motor should turn when you spin the drum.
- That’s it: replace all the pieces you took apart when you started, making sure to remember to reconnect the switch for the dryer door. When it’s all back together, give it a try. Now instead of heating and not spinning, you should be back to a dryer that heats up AND spins!
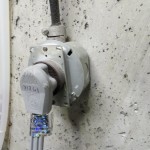
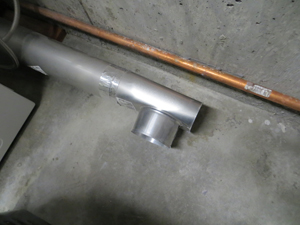
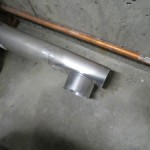 Make sure to reconnect the air vent on the back of the dryer and you’re done! While you’re messing with the dryer, it’d be a good time to clean out or replace the vent hose. I once saved around 20 percent on my entire electric bill by switching the plastic collapsible style dryer hose with the smooth metal vent pipe you see here. Highly recommended!
That’s it! Next time you have a dryer that heats up but won’t spin, you’ll know just what to do and can save yourself an expensive repair bill!
PTNick! Fabulous info! When ours seems it pooping out, I can try this before purchasing another or calling a repair guy. Say, how much would it have cost for a repair guy to do what you did? That would really drive your point home to have an estimate of that!
Have a grand Wednesday!
That’s a good question, CJ! I figure the repair guys will charge you $300 to even fart near you, so I’d say the savings would be significant!
Now if that isn’t the funniest comment I’ve ever seen, PT Nick, then I don’t know what is! Our dryer dial recently broke, and we ordered it online for $10 and no shipping. If you don’t think the Internet has made our lives great, try calling out the repair guy to stink up your house and charge you for it!
Heh, thanks, Tammy! Good job on your fix! I don’t even know what we did before the internet!
Could you tell me why my dryer heats up but the tumbler does not spin. I thought it was the motor so i changed it and it still won’t spin. What else could be wrong?
Check your belt tensioner. If it’s not keeping enough tension on the pulley the drum will not tumble even with a working motor. I know this is an old post but hopefully someone will find this useful.
Where was this article when my dryer conked out in my rental. Oh well there goes $104.
New reader here, when I have kids I want to be preretired.
charles@gettingarichlife recently posted…How my BMW cost me $250,000
Welcome, Charles! If you have a rental, you’ll be fixing a dryer again soon, trust me!
Glad you’re joining me on the pretirement bandwagon!
Isn’t it amazing how most people won’t even attempt a fix themselves? The default action is to pick up the phone and call someone.
However, I find that it’s easier than ever to fix stuff with the Internet. I had never heard of repairclinic,com, but have used YouTube for numerous repairs and home improvement situations.
Mr. 1500 recently posted…SpongeSister SpendyPants
YouTube is usually my go-to, but I was searching for the part number on Google and came across this site. I’m absolutely amazed how much money they put into making these high-quality videos. They’re super impressive.
Super cool. Thanks again for the tip.
Mr. 1500 recently posted…Thursday Rant: Big Sis Amiss in Financial Abyss
Why, you clever McGuyvering SOB! Very nice.
Quick washer tip for those with kids, use a laundry bag for those cutesie socks because otherwise they WILL clog the line and result in some “non-routine” maintenance.
No Waste recently posted…I Don’t Trust You, Mega Corp
Good tip, No Waste! I haven’t yet gone that route because Pretired Baby hasn’t been wearing many socks lately (or shoes for that matter). But now that we’re getting closer to winter, I’ll have to remember that!
I love DIY…well I love the idea of it. I definitely like to be able to fix things and I always try, but I’m not too handy. Last night, I broke one of the pieces of my son’s pack n play…I blame poor quality. I live in an apartment and the super takes care of most things like when the dryer breaks so I’ve been spoiled.
Andrew@LivingRichCheaply recently posted…Opportunity Knocks: A Two-Income Family
Yeah, if I was renting, I probably wouldn’t bother fixing things myself. Well, maybe if I was renting a house where it’d be faster and less of a pain than calling someone. But good skills to have for sure!
Great job! I’ll bookmark the site for future reference. I definitely need to learn to fix more stuff. I’m not too bad with small appliances.
retirebyforty recently posted…Ben’s 7 Phases to Retirement
Yeah, it’s definitely handy. With those rentals, the more stuff you can fix yourself, the better!
We had a similar issue with our washing machine that was delivered to our house. We had it all stacked up and installed but it kept shaking the house. Initially we thought it was out of balance but after a little googling and investigation we realized that the shipping bolts hadn’t been removed. So, 2 minutes of time and we were ready to rock!
Stephen recently posted…Athens, Ga – Best Town In The World
Wow, good for you, Stephen! It’s pretty alarming when those big units start rocking around so good on you for figuring that one out!
Great job, Nick! We had a similar situation when the heating element went out on our dryer. What the repairman was going to charge us a bit over $200 for, Rick fixed for $15 by getting the part online and watching a repair video. The savings on DIY repairs is amazing!
Laurie @thefrugalfarmer recently posted…Planes and Perseverance
Yeah, the dryer, in particular, is such a simple piece of equipment it makes no sense to hire help in most cases.
Thanks for the detailed instructions. I love fixing my own stuff and saving hundreds of dollars. No only do you add the knowledge, you save the cash.
Free Money Minute recently posted…Run for Your Lives!
You got it, FMM! I think the learning might actually be more important than the actual fix!
I have a front loader washer and dryer. They can be stacked, or not. Mine are not, and the dryer won’t run. The belt is not broken. A few years ago I fixed it a couple times by manually spinning the drum, and slamming the door while holding the start button on. So I got the door shut before the drum stopped moving. After doing that a few times, it worked normally.
But this time it doesn’t do anything but take up space.
Crazy! These appliances, especially clothes dryers, can be so frustrating when they don’t work right!
Thank you so much for your picture of how the tensioner is supposed to look. We just bought a house and kept the old appliances, and as soon as I tried my first load of laundry we knew something was up. The tensioner had completely fallen off – we fixed that by drilling a hole through it and screwing in a bolt. But we couldn’t figure out why the belt was still so loose! As soon as I saw the picture, we went back downstairs and had it back together and running in five minutes.
My Maytag Performa dryer won’t spin but belt is good, what could be the problem?