Category Archives: Saving Money

How to save money on vacation

Changing your mindset is the key to maximizing your vacation savings

how to save money on vacation

How to save money on vacation — change your mindset!

One of the hardest things about living in Seattle is that the winters can be long. The weeks between the day we win the Superbowl to when the tree pollen traps us indoors can be the longest, most depressing weeks of the year. Rainy season here (really more of a nonstop, grey drippiness than real rain) lasts from around late October until July 5 in a typical year.That’s why we usually plan a vacation to somewhere warm and sunny in late February or March. When we return, we’re usually safely into springtime and ready for a glorious Seattle summer.

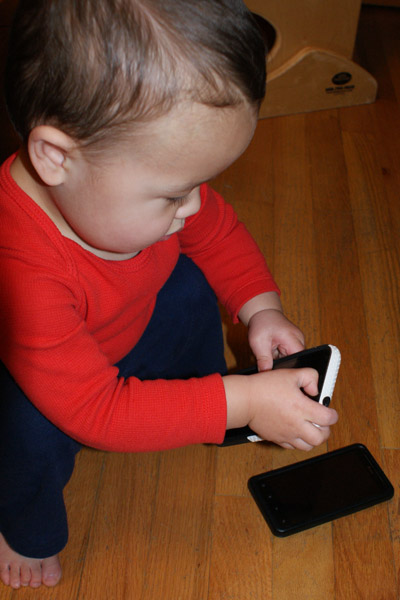
We were particularly nervous this year because it was going to be our first trip traveling with a toddler. Would we be the embarrassed parents trying to quiet a screaming child? What if there was a major poop explosion? We packed SO many toys, loaded our iPads with movies and brought along enough food to keep the entire plane fed for a month. We were ready. We thought.

It started off well enough, Pretired Baby had a blast running around in the airport and was already looking tired by the time he got on the plane. He was fascinated by the magazines, the windows, the tray table and all the other people. About two hours in, though, he drank a bunch of milk and laid down on our laps and fell asleep. He slept for a blissful 40 minutes or so and we even took his picture because he was sleeping so sweetly. We couldn’t believe our luck.

Suddenly he awoke with a kind of coughing noise, tried to sit up and started puking ALL OVER Pretired Mama.

“Lean him forward!” I shouted and he puked some more. He’s only thrown up one other time in his whole life and that was such a small amount it barely counted. He was scared and obviously didn’t feel well. He began crying loudly. I called the flight attendant who brought bags and paper towels but there wasn’t much else we could do. We managed to clean him up and calm him as best we could. He was finally quiet and cuddly but still feeling sick. Time remaining: about three hours of hell. Uh oh.

Over the next three hours, he puked.

And puked.

And puked.

The faces of the most annoyed and angry people, frustrated at having a screaming baby on their flight, eventually softened to sympathy and finally open pity or even horror. It may have been the worst flight of their lives, but, hey, were THEY the ones covered in puke?

We let everyone else get off the plane and finally shuffled off the plane, carrying our luggage, a toddler and two large garbage bags full of puke-covered clothes and other items. Did I mention there was a lot of puke? OK, good.

We decided to stop by the urgent care on the way to our condo just in case and almost died on the way. Pretired Baby started puking while we were driving but since he was slightly leaned back in the car seat he was having trouble getting it out. I was sitting in the back seat with him and told my wife to quickly pull over so I could loosen his seat and lean him forward a little bit. She pulled over and I unbuckled the top clip and leaned him forward a little bit and caught the puke in my already covered shirt I’d removed at the airport — the last thing I had with me for collecting puke. My wife suddenly gasped and I turned my head to look out the back window. A car was coming toward us fast — in the shoulder and obviously not seeing us. It fortunately swerved back into the traffic lane at the last second. If it had hit us, at least two of us would have been killed and one of them would definitely have been Pretired Baby, in his car seat with the car seat clip unbuckled.

Anyway, crisis averted, we made it to the doctor (who had no idea what was wrong and just gave us advice for treating nausea and thought it might be altitude sickness) and finally to our condo. Pretired Baby had a rough evening, but he eventually fell asleep on me and slept all night. The next day took him awhile to bounce back, but the day after that he was fine — which is when I came down with the same bug. It took me down for a night and the better part of a day, after which vacation finally started. At least we knew it wasn’t altitude sickness then, which meant the flight home should be better.

Why it’s worth trying to save money on vacation

A plane trip like that is a good reminder that plane travel — even when everything goes great — is a horrible experience. Even the best trips are an endurance test while the worst trips leave you wondering why you spent good money on such misery.

Fortunately our trip was very inexpensive. We had plenty of miles for our plane tickets and Pretired Baby traveled free as a puking lap baby. The suckage that is airplane travel is actually lessened quite a bit by knowing it was free or close to it.

The other reason to try to save money on vacation is that it can be quite expensive. You already have lodging — although that can also be free or close to it as well — you have food costs, which can be quite a bit if you eat out throughout the trip, you might need a rental car and you’ll likely spend some money on some sort of activities once you get there as well. It all adds up. A small family taking just two trips a year could easily drop $10,000 or more just on travel — that’s almost half of our core operating costs for the year! If you want to keep that up while paying out of pocket for everything, you might need twice the pretirement fund you were aiming for.

How to save money on vacation: shift your mindset

Since I already mentioned that we traveled to Maui with miles, you’re probably assuming that I’m going to start talking about travel rewards cards, card churning and other strategies that others have written about much more eloquently than me.

And while I AM advocating using rewards credit cards, what I really want to explain is an important mindset shift that my family has recently undergone.

You see, we’ve traveled ALL OVER this lovely planet, generally paying very little for the tickets that got us there, thanks to having accumulated many airline points. But we could have spent even less.

Most people, I think, are like us. Yes, they have rewards cards and yes, they build up over time with normal usage. So when we think about taking a trip, we get most of the trip planned and then finally we’ll say “Hey, do we have enough miles to pay for that?” Sometimes the answer is no and we’ll pay out of pocket. More likely, though, we’ll be just a little short and we’ll buy a few miles to get us over the top.

So we’ve shifted our thinking completely. Instead of planning a trip and then seeing if we have any miles we can use, we are planning our trips first and STRATEGICALLY building up miles toward each trip. And the biggest key to that, beyond planning farther ahead than we normally would, is to focus on sign-up bonuses vs. earning points over time. The sign-up bonuses require a certain amount of spending in the first few months so it’s critical to pay attention to the details.

It’s worth getting help

Getting organized on strategic rewards credit card usage can help you save money on vacation, but it’s an overwhelming world of intentionally confusing marketing. That’s why I enlisted the help of my friend Brad from Richmond Savers to help me sort through this mess. Brad offers free travel rewards coaching. All he asks in return is you sign up through his affiliate links and he then gets a small commission from the credit card companies.

We started by doing some thinking about the trips we wanted to take over the next few years. Here’s what we’re thinking right now:

  • 2015: Hawaii again, but probably Kauai this time. I think we like it better. Its laid-back vibe fits our personalities better than Maui.
  • 2016: Disneyland. We’re planning a joint trip with my brother’s family. I guess it’s one of those trips that’s unavoidable when you have kids.
  • 2017: Scandinavia: I’ll be turning 50 (really?) so we want to go visit the motherland to celebrate.
  • 2018: Italy: My wife wants to go to Tuscany when she turns 40. If all goes well, we may also be celebrating her pretirement!

It is generally a good idea to start with the trip coming up the soonest so we’re focused on building up enough miles for next year’s trip to Kauai. The way we’re doing this is via the British Airways rewards card, which gives us 50,000 miles. My wife signed up first and I think we’ve already got enough spending on the card to receive our points. Next, I’ll be signing up for the same card and getting the same points.

Once we have those banked, we’ll move on to the next card in our plan and keep going until all our trips are covered. It actually looks like we can pretty much get ALL of our needed plane tickets for nearly free with just our normal spending. We also have some spending we need to do on the house this summer so we’re going to try to time that work with the new card signups to maximize our signup rewards.

On top of that, we should be able to leverage rewards to gain big discounts with Disneyland and we’re even looking at some strategies for getting free hotel stays in Europe when the time comes. While we would have probably gotten most of our plane travel free or greatly reduced with our other points programs, by planning ahead and targeting the card usage at specific trips is the key to maximizing our vacation savings.

Other ways to save money on vacation

So now that you’ve hopefully joined me on my mindset shift and are now targeting rewards credit card spending toward specific trips, I’ll also share some of my other favorite tips for saving money on vacation.

  • Consider VRBO rentals instead of traditional hotels. Obviously you can’t apply rewards points toward private vacation rentals, but if you’re not using points anyway, choose a vacation rental. We use VRBO for at least 80 percent of our trips these days. Mainly because these private homes are usually better set up for traveling with a child. There are usually separate rooms and full kitchens, etc. Even if you only eat in for breakfast and go out for all your other meals can add up to a lot of savings.
  • Book your hotel first. For some reason travelers OBSESS over airline costs. There must be some weird psychology going on where people just cannot handle paying $10 more than the person sitting next to them because people will go through all kinds of maneuvers to save a little bit on plane tickets. Meanwhile they’ll often overpay for hotels on the same trip and not give it a second thought. What you need to know is that there is NO cancellation fee for most hotel bookings but there almost always is for airline travel. You can reserve your hotel stay first and then start looking for airline deals. If you find you need to adjust your stay a little bit, go ahead and make the changes then call the hotel and change your reservation. Hotel prices also fluctuate quite a bit just like airline prices. But if you see a better deal on a hotel than the one you already have, you can simple call and get the same deal. (We have had to cancel and rebook before, but it’s never been a problem.)
  • And just for fun, one of the ways we saved a little bit on this trip was to utilize the local library. In Maui you can get a temporary library card for $10 so we were able to load up on books (they also rent DVDs) and keep Pretired Baby entertained without packing a bunch of heavy books or buying a bunch when we got there. They also had a free storytime for toddlers so he was able to go to that also for free. I do love libraries!

I’ll share some other tips for saving money on travel in the coming days, but in the meantime, what are some of your favorite tips for saving money on vacation? 

The latest on my quest to reduce my cell phone bill

I’ve been working hard to reduce my cell phone bill. Here’s the latest

reduce my cell phone bill

My continued quest to reduce my cell phone bill — you can never have too many smartphones around.

It was way back in July when I last talked about my attempts to reduce my cell phone bill. If you’re looking for ways to bring down your monthly costs and are still dealing with an overpriced monthly contract plan, it may be an interesting read for you.

Back then I had begun testing a VERY low-cost cell phone structure, combining a Freedom Spot Photon 4G Mobile Hotspot with very low-cost prepaid (but auto-renewing) cell service from AirVoice. Total cost: $10/month. The trick is to move your main number to Google Voice and use the AirVoice number only for emergencies.

I’ve done quite a bit research since then on possible low-cost cell phone options and tried to keep track along the way. The results of my search for ways to reduce my cell phone bill are below, if you want to just jump ahead.

But first the update on my FreedomPop+AirVoice super cheap solution. The positives were that I could keep my same phone, which I was happy with, the low cost and the fact that I had no contract. Not being under a contract left me free to easily test without being committed to two years stuck with one carrier.

The negatives were that I had to pack a separate piece of electronics around all the time (not that big of a deal), and that the FreedomPop’s coverage was extremely limited (much bigger deal). Basically it gets a nice, strong signal in the main city, but anytime you leave the heavily populated areas, say 15 miles from downtown in any direction, it completely loses its signal. That actually became something a big pain any time we took a road trip. (One additional pain was that I got a lot of spam calls via the AirVoice number, which I found odd.)

So while I got used to the hassles of this set up  and didn’t even think much about it after a while, I began to consider my next test. There is a bit of a price war going on right now so real prices for cell phone service have been dropping rapidly, just as I predicted they would. So it’s pretty easy to find a solution for around $30 these days. But I wanted to save even more!

Giving Ting a try

My latest attempt at reducing my cell phone bill was to sign up with Ting. I canceled my AirVoice plan (I still use the FreedomPop from time-to-time as it has more utility for me than just supporting my cell phone.)

Ting has one of the most interesting models for reducing cell phone costs that I’ve so far found. I highly recommend trying it to just about anyone because it’s very likely they could save you a lot of money right away.

The way Ting works is they bucket your actual usage and charge you for what you actually used. Duh! Why has no one done this before? If you check out their Rates page, you can click the various boxes in their grid and the page will compute what your bill would be.

I’ve been using them for two billing cycles now and both bills were less than $12! That’s pretty sweet, given that I’m willing to pay up to $30/month if needed. And, remember, this is a no-contract carrier, so anytime I decide I’m unhappy, I can walk.

I did have to buy another phone because Ting uses Sprint’s network and my old phone was an AT&T phone. I picked up a used one for $120 — about what I can get for my old phone. I haven’t sold my AT&T phone yet, just in case I decide to try something else. So right now I own a Sprint phone and an AT&T phone.

Google Voice is still the backbone

It’s important to keep in mind that keeping my cell phone costs so low is only possible because I use Google Voice as the carrier for my main phone number. All my texting and most of my calls are done via Google Voice. The only data I use via Ting is when I can’t reach my home or other WiFi, which given that I’m home most of the time is rare.

Google Voice works pretty well for the most part. I love the transcribed voice mails and it’s very handy to “move your phone” by simply logging on elsewhere.

Phone conversations are sometimes choppy and there is that annoying slight delay that causes the two people to occasionally talk over each other. But, hey, it’s free, right?

You can read up more on how Google Voice works in my last post.

You get what you pay for

So this solution is not without its hassles. I’ve experienced delays in sending and receiving text messages, calls via Google Voice where the other party is very frustrated they can’t hear me (they say I’m “breaking up”). Calls were much more reliable before I got this Sprint-based phone to use with Ting. With everything else being the same — same WiFi, same App, same location — the call quality was much worse with my Samsung Galaxy SII than my HTC Vivid. I believe that this is because the WiFi receiver is not as powerful in the Galaxy.

Frustratingly when on a recent call with a consulting client, I had to give up on Google Voice and call her via my Ting line. She said it sounded MUCH better — and then that call dropped. Embarrassing! (Note that I’m not necessarily saying Ting is lacking because of this. We live on the back of a hill and always have weak cell phone signals here.)

So I’m still testing. I can deal with a little bit lower quality, but I do need reliability. I don’t talk on the phone very much but when I need to, it had better be there.

The app world is still pretty shaky

I have found a lot of difference between the various apps that exist to support Google Voice. There are three that I’ve tried: TalkaTone, GrooveIP and Spare Phone. TalkaTone was godawful. I suppose I should try it again, but my experience was so bad I cringe thinking about it. For quite a while GooveIP was great, although I was hoping for some software updates to correct some problems in maintaining a connection to Google Voice. They actually did improve that massively in a few later updates, but unfortunately they also seem to have screwed up the call quality. Just a few days I dropped that to try Spare Phone. Spare Phone is a much simpler app and has been working pretty well lately. It’s still too early to make a final judgment, but I like it so far. My only complaint is some scratchy call quality on my end. People I’ve talked to haven’t complained yet, so time will tell.

Other ways to reduce my cell phone bill

While it has some great benefits, using Google Voice is a fairly extreme way to drop your cell phone costs. By channeling the majority of your calls and texts through Google, you can greatly bring your costs down if you choose a low-cost cell phone.

There are some other ways to go, though. A few honorable mentions from my research.

  • Red Pocket Mobile 
    Red Pocket Mobile offers coverage on both GSM and CDMA networks so this could save you from having to buy a new phone if you want to test out a low-cost cell phone carrier.
  • Republic Wireless
    While I’m a huge fan of the Ting business model, the Republic Wireless model is probably my second favorite. Republic works by utilizing WiFi for its calling the majority of the time and then uses a cellular network when WiFi is unavailable. They cleverly switch seamlessly (UPDATE: Maybe not seamlessly — see comments) back and forth between the two networks so you don’t notice the switch. Thus they’re able to keep their monthly prices low — $25 for a standard plan. The big negative, of course, is that you have to use their proprietary phones to make this work. That means buying another phone for as much as $300. Assume you’ll keep your phone for two years and convert that to a monthly price and that’s another $12.50/month. So you’d basically be back to $37.50/month, which is no longer one of the cheaper options. If you can be disciplined and keep your phone for four years, that’d effectively put you at $31.25, but, again, that’s basically the same as many of the carriers below. If I could get a Republic Wireless phone cheaper, I’d be all over this. But if you need to buy a new smartphone anyway, this could be a good option for you. 
  • FreedomPop
    FreedomPop is really shaking things up in the industry by taking the price right to zero. Free data, Free texts and free voice — all of which are very limited — could be just the ticket for a light user. Based on my mobile internet experience, however, I’d be very worried about the coverage map. Hopefully this spreads and helps bring down the cost for the entire industry. 

These days there are many ways to reduce my cell phone bill so I don’t think I’ll ever need to pay more than around $30/month. I’ve been lower than $12 for around six months or so and while I can’t say it’s completely bulletproof, at this price I can handle some hiccups.

Here is a table I put together based on my research of low-cost providers. Take a look, explore. Your mileage may vary, but as long as you stay away from any long-term contracts, you can test a few different options until you find a good fit for your situation:

Lowering my cell phone bill: No-contract cell phone options

CarrierTalkTextDataPricingNotes
TingVariesVariesVariesVariesI love the Ting model -- a true pay for what you use structure.
FreedomPop200 minutes500500MBFree! (If you stay under their usage limits)Check the FreedomPop web site for details on their free phone plan. The Freedom Spot Mobile Hotspot is available at Amazon.
Republic WirelessUnlimitedUnlimitedUnlimited$25/month (3G)Republic Wireless has a unique offering heavily utilizing WiFi to enable calling. Based on the network speed desired, Republic has plans higher and lower than shown here.
AirVoice WirelessUnlimitedUnlimited100MB$30/monthAlso check out their other plans. There are quite a few viable options available for low cost.
ChitChat Mobile250 minutesUnlimited250MB$20/monthChitChat offers mix-and-match style pricing. Take a look at what you need and see if one of their plans would work for you.
Simple MobileUnlimitedUnlimitedUnlimited$25/month
Consumer Cellular200 minutes1000100MB$25/monthConsumer Cellular is oriented toward the senior market. Many mix and match options to choose from.
I-Wireless200 minutesUnlimited200MB$25/monthOwned by grocery chain Kroger.
T-Mobile Prepaid100 minutesUnlimitedUnlimited$30/month
TracFone Wireless200 minutesIncludedIncluded$30/monthSeveral plans offer triple minutes with phone purchase. They also offer some pay as you go plans. Many of their offerings include bonuses in minutes and texts. It may be worth investigating their options if you think they might work for you.
Straight Talk Wireless1000 minutes1000Unlimited$30/month
H2O WirelessUnlimitedUnlimited500MB$30/month
Virgin Mobile300 minutesUnlimitedUnlimited$35/month
Go Smart MobileUnlimitedUnlimitedUnlimited$35/month
Net 10 WirelessUnlimitedUnlimitedUp to 500MB$40/month
MetroPCSUnlimitedUnlimitedUnlimited$40/monthOwned by T-Mobile
GoPhone500 minutesUnlimited200 MB$40/monthAdditional data can be added to this plan for $5/MB. They also have other plans available.
PTEL MobileUnlimitedUnlimitedUnlimited$40/monthA $35 plan is also available without high speed internet.
CricketUnlimitedUnlimitedUnlimited$50/month
Boost MobileUnlimitedUnlimitedUnlimited$55/monthBoost also offers a gimmick where you can drop your bill by paying on time.
AIO WirelessUnlimitedUnlimitedUnlimited$55/monthOwned by AT&T
Verizon Wireless PrepaidUnlimitedUnlimited2GB$60/month
Red Pocket MobileUnlimitedUnlimited100MB$30/monthAlso has a basic $10/month plan. Red Pocket offers both CDMA and GSM so you may be able to bring your existing phone regardless of your current carrier.
Prices and details shown here are subject to change. Some links include affiliate links so I may get a few cents if you make a purchase.

How much are you guys paying for cell phone service these day? What service are you using to keep cell phone costs low? 

How we saved money with reusable cloth diapers

We saved a bundle by switching to reusable cloth diapers. Here’s how we did it.

cloth diaper bubble butt

What’s not to like about a cloth diaper bubble butt?

This post is going to talk a lot about feces. If you don’t have a baby already or in your future or if you just don’t want to read about how to restrain the mud bunnies, you might want to explore another corner of the internet for awhile.

That’s because there’s a lot of hell’s candy involved with babies. If you’re one of those people who gets squeamish at the site of chimp chunks you might want to just be sure your birth control situation is locked down because there is no escape from the butt brie once the baby arrives.

Now when you have a baby, one of the first decisions you’ll have to make is what kind of diapers you’re going to use. We knew we weren’t going to be purist about it so we accepted that some disposable diapers were in our future. At the same time, the image of how many diapers our baby would use before being potty trained was disturbing. A typical baby will go through some 3,800 diapers in its lifetime.

Our strategy was to minimize the use of disposables as much as was reasonable. We decided to go with a local diaper service company. At $100/month, the price was comparable to what we’d likely be paying in diapers given how many he was going through in the early stages. More importantly, the convenience and waste reduction made it worth it to us.

The service would deliver a nice, fresh packet of diapers to our doorstep each week and take away the bag of diapers soaked with pee and pocket pesto. Pretired Baby really seemed to like the diapers and they were very easy for tired new parents to deal with as well.

All the pieces for using reusable cloth diapers

All the pieces you’ll need to contain the poop

But once he started sleeping blissfully through the night at three months in, our minds cleared and we began to re-evaluate our diaper strategy. Eventually we settled on washable cloth diapers. We canceled the diaper service and purchased used GroVia diapers from DiaperSwappers.com.

These diapers, along with similar versions, consist of a cloth insert that snaps to a waterproof cover (or “wrap”). We bought about a dozen wraps (you can use them a few times before they need to be washed) and more than 30 diaper inserts. In retrospect, we could easily have gotten by with a few less of each. The trick to how many you need is to estimate how many diapers you need in a day, decide how long you want (or can stand) to go between washing and do the math. (You can always buy what you think you need and buy a few more later if you find you’re running too low before you do laundry.) We bought all our diapers and wraps used and paid about $400 for everything. That seems like a lot (even considering we broke even in four months), but keep in mind we’ll also be able to sell these again when we’re done, hopefully at a minimal loss.

We’ve been using these diapers for about a year now and really have no problems to report. Right now we’re still using one disposable at nighttime as our one attempt at an overnight cloth diaper resulted in soaked sheets.

How to use reusable cloth diapers

OK, so we’ve established that we no longer just pull off the diaper covered in butt butter and just drop it into the bin to be left out for the diaper service company. Now we were up to our elbows in squishy baby gravy — what are we supposed to do with it all? There are a number of subtleties to using these diapers you’ll need to know about if you’re planning to go this route. Nothing is terribly difficult once you get in the routine, but expect a little trial and error as you get started.

Reusable cloth diapers ready to install

Assembled and ready to install

Now if you do any amount of research on these reusable cloth diapers, you’ll sooner or later come across someone touting the use of a “poop spatula.” The idea is that you keep an old spatula next to your toilet that is clearly marked “POOP”, or “MUD”, “DEUCE” or whatever you like. (The labeling is so you don’t accidentally end up mixing this spatula up with your cooking supplies.) We read about this concept and said, “Um, no.”

Fortunately there’s a better way to get the paydirt off your fancy new cloth diapers. It’s called a BioLiner and it acts as a handy barrier between the black banana and the diaper you’ll be tossing into your washing machine.

So proper assembly involves the outer wrap into which you’ll snap the cloth diaper, then you’ll add on a single BioLiner. Snap the kiddo up and you’re on your way.

Adding a booster to reusable cloth diapers

For naps and other long stretches, you’ll need to add in a booster for extra pee storage to make sure the reusable cloth diaper can handle the volume.

But, wait, you say! Does that little strip of cloth really hold all that pee? Doesn’t it leak out? Well for normal, daily usage when you’re able to do a diaper change frequently, it can easily hold it. But for longer stretches, such as a nap, it’s not typically enough. The solution for that is something called a “booster.” It’s an additional strip of material that you add to the mix to hold the extra liquid. For boys you’ll want to fold it in half and place it right in the front.

How to wash the reusable cloth diapers

So say your crumb cruncher suddenly goes quiet and with a focused look begins grunting and straining. You know what lies in store. “Are you poopin‘?” you ask softly.

Sure enough, you pull back the diaper to reveal a fresh new set of moon rocks! Here’s what to do: Get your next diaper all prepped. Take off the offending diaper and carefully set it aside. Clean up the perpetrator and put him or her somewhere safe.

Next take the whole smelly mess to the bathroom and shake off the stink brick, kerplunk! right into the toilet. Now the BioLiner is supposedly “flushable” but that doesn’t mean it should be flushed. These “flushable” products are notorious for clogging up your home’s plumbing and are hated by utility companies who must contend with sewage systems that aren’t geared up for products that don’t break down in water. That said, there’s been two or three times when the chocolate surprise was so squished into the liner that it ended up going down the drain. You could alternatively bag it up and send it out with the trash, though. But generally I just hold the BioLiner by a clean corner and give the whole thing a little shake and the stinky pie drops into the water. Sometimes a little number 2 gets on the cover or the diaper where the BioLiner wasn’t covering well enough. That can be rinsed off or wiped off with some toilet paper.

So that gets rid of the nut log, but you still have the diaper to contend with. Unsnap it from the cover, pull out the booster if you had one in there, and drop the whole thing into your airtight diaper container. You’ll want to have two reusable diaper pail liners so that you can rotate them as you do your laundry.

Before you have kids, you imagine the nonstop supply of Wendy’s Frosties being the worst part of the diaper experience. It turns out it’s actually the eye-watering urine smell. It really builds up after a few days of urine-soaked cloth diapers sitting in a diaper pail. So I generally end up washing smaller loads twice a week instead of one big load once a week.

Washing reusable cloth diapers

Rinse then wash. Then rinse again.

So here’s how to wash your cloth diapers. Hold your breath and quickly open the diaper pail and pull out the pail liner, closing it quickly. Once at your washing machine, hold your breath again and dump it in, making sure to spread them around. Then turn the liner inside-out and put it in there as well. We generally just wash the covers with the regular laundry but if some of them get a little butt hail on them, they can be washed with the diapers as well.

Don’t add any soap! First, you’ll run a rinse cycle on warm to get off any nuggets that have managed to escape the system so far. Once the rinse cycle completes, you’ll add the soap — and yes, you need special soap. We use Country Save Laundry Detergent and it seems to work great. Toss in a scoop, run the wash cycle on warm and add another rinse cycle at the end.

It doesn’t seem like that’d be enough to keep them clean, but they actually do come out perfectly clean on the other end. Unfortunately there’s one last step. Remove any covers and the liner bag, which can’t be put in the dryer. Hang those up to dry. Then turn each and every diaper inside-out so that it can dry completely. Run the dryer on medium heat and for as long as a cycle as your dryer has.

That’s it — put them away and they’re ready to catch another load of poo stew.

Just a couple other tips:

  • Don’t use any Vaseline or waterproof diaper cream because those will ruin the absorbency of the diapers.
  • Skip the dryer sheets. They leave a waxy (chemical) film on the material, reducing the absorbency. You’ll want to pick up a set of these dryer sheet alternatives instead.
  • Over time they can start to smell a little woofy. Not like a sewer, but more like a wet dog. When that happens, or if they lose some absorbency, they need to be “stripped.” There are several ways to do it, which you can do your own research on, but we just washed ours a couple times in hot water and it seemed to do the trick.
  • These diapers can get a little stained over time. When that happens, you can lay them out in the sun for a few hours (we have to wait until there’s some sun here in Seattle, which could be awhile). That should whiten them up enough to be tolerable.

OK, I think that’s everything I’ve learned about using reusable cloth diapers. What do the savings look like? Well, we were spending $100/month on the diaper service before and now we only buy one pack of disposables from Costco every few months. Obviously our utility costs have gone up a bit, although it’s been subtle enough I haven’t even noticed it, and it’s impossibly hard to measure. But I’d estimate we’ve easily saved at least $50/month and maybe as much as $75. That’s not too shabby. But the best part is all the disposables we’re not using. Having a baby is one of the worst things you can do for the environment, but hopefully we’ve eased that burden at least a little bit by using reusable cloth diapers.

Here’s your shopping list if you want to go this route. Remember to buy used whenever possible!


How to make your own Braun shaver cleaner

Wondering how to make your own Braun shaver cleaner? Turns out it’s really easy

How to make your own Braun cleaning solution

How to make your own Braun cleaning solution — just clean out the cartridge and replace with isopropyl alcohol.

It wasn’t long after the first Earth Day in the 1970s that a nascent environmental movement began growing from a tiny group of committed citizens and started spreading into the mainstream. I was in grade school at the time and looking back it was easy to see the very early stages of environmental enlightenment seeping into our lives.

I remember stickers (stuck on everything in sight, walls, poles, bus seats, you name it) shouting “Don’t be a litterbug!” I remember some hippie visiting our classroom with her acoustic guitar and teaching us Creedence Clearwater Revival’s “Rolling on the River” except the lyrics were changed to be “Rolling, rolling in pollution.” Then there was the guest speaker from the local energy company reminding us to take shorter showers. And of course our teacher spent a lot of time explaining why overpopulation was the biggest environmental problem of our generation (using math to show the compounding nature of population growth). A lot of those lessons stuck and while I don’t claim to live a sustainably perfect life, I do try to make reasonably good environmental choices.

One of the lessons that stuck with me was from a large school assembly. I think the presentation was from the local nuclear power plant (ironic given how awful nuclear power is for the planet). Anyway, the only takeaway I remember at all was that the speaker asked the audience which shaver used more resources: the electric version in his left hand or the disposable razor in his right hand.

Many of the kids shouted that the electric shaver used more resources, because it uses electricity. The speaker, enjoying tricking the kids with his question, explained that while the electric razor certainly did use power (he was from the power company after all), disposable razors had to be manufactured, wrapped, shipped, purchased then replaced. Over and over again. While I was still years away from the arrival of my first peach fuzz, I imagined a lifetime of disposable razors accumulating in a mountain behind me. It may have been one of the first moments that I became aware of the heartbreaking waste of our disposable society.

When my first soft, breezy whiskers arrived, I scraped together a few dollars and bought myself my first electric razor (like all my coming-of-age rituals, it was strictly DIY.) The tiny bits of blond hair were washed down the sink with the rest of my childhood. I used that trusty razor right up until the day I caught my stepmom using it on her nasty legs. (Ew)

In the decades since that horrible image was burned into my eyes like white fire, I’ve only owned maybe three or four other razors. I have never shaved with a blade. My current electric razor is just a few years old. Unfortunately in recent years I’m either seeing a sharp downturn in product quality or an increase in stubble strength as I reach middle age. Probably both.

On the other hand, one of the innovations I really like has been the advent of built-in cleaning mechanisms so your razor stays clean and sharp and ready to go. Before the self-cleaning versions came out, you had to delicately clean the cutter with a little brush and it never really got as clean as you’d want. Now you click a button and the next day, voila! clean razor! My current one is an older version of the Braun Series 5.

There is a problem, though. In the business world, there’s a famous saying that the money is in the blades, not the razor. It’s the classic replenishment business model. Printer ink is another great example. Give the razor (or printer) away for cheap and people will pay a lot more for the blades (or ink). Braun sells replacement cartridge refills but here we are again on the replenishment treadmill again! The price has really come down on these lately so it’s not as annoying as it used to be, but still! Plus here we are again with more plastic for the landfill.

The design of the Braun is also very annoying because the cleaning solution isn’t used up in the cleaning process. Most of it just evaporates! I tried putting the little cover over the cartridge holes but it basically had no effect on evaporation unless I sealed it on tight, which is not practical on a daily basis. (I’d say a cartridge maybe lasts two months when used normally.)

So I wondered: How can you make your own Braun shaver cleaner? Was there a way to hack my Braun to give me the sweet cleaning power I desire without the waste of buying replacement cartridges all the time? I looked around for bulk cleaning solution, but didn’t find much out there. I did find this Sandalwood Tree Cleaner that I have not yet tried, but may in the future just to see if I like it. But surprisingly the choices were pretty scarce.

I did finally try a solution that has been working well so far. It was simple and I’m very happy so far. Here’s what you do:

Once the razor solution is too low to do any cleaning, dump it out in the sink and rinse out the container as best you can. It doesn’t need to be completely spotless.

Then refill the container with Isopropyl Alcohol, inexpensive and available at any drugstore. I don’t know if the percentage makes a difference. I used 91 percent since that’s what we already had on-hand. I imagine the lower percentages might be gentler on the shaver. Don’t fill it up to the brim. Just fill it as full as the new ones, about two-thirds of the way full. Put the cartridge back into the device and you’re ready to clean. It does smell like rubbing alcohol but not so much that it’s overpowering. Adding some lemon essential oil would probably help, but I haven’t tried that so far either. The cleaning solution you buy also supposedly lubricates your shaver, which could be a problem long-term, but so far I haven’t noticed any difference. I may buy one new cartridge a year or so just so I can occasionally start with a clean one (it’s impossible to get all the hair trimmings out of a used cartridge). That might help if I did need some lubrication help. If it becomes a problem, I might add a little baby oil in as well to see if that makes a difference, but so far so good.

Before I tried my new homemade Braun shaver cleaner, I was thinking I was probably due for a new cutting head because the razor just wasn’t getting the job done. After enjoying a nice, crisp shave with this cheap solution, I think my cutting head is fine for awhile longer. So far I’m saving a little bit of money and the mountain of plastic behind me will be a little smaller because of it. And that alone makes it all worth it!

UPDATE 2/13/14: I founds some essential oil around the house so I dropped 3 or 4 drops into my reservoir to see what happened. OMG, it was the final piece! The Braun razor ran much smoother and was less abrasive on my skin. I’d say this mixture is AT LEAST as good as the store-bought version now! 

Disclaimer: Alcohol is flammable. Be careful when refilling and using this technique. Also, I’m sure Braun does not recommend using anything but their own solution. You could severely damage your razor by using a product other than what the manufacturer recommends. Try it at your own risk. Also, links in this post are affiliate links so I may get a few pennies if you make a purchase.

Related Posts Plugin for WordPress, Blogger...
XXXX